


Admin
-
Posts
2,087 -
Joined
-
Last visited
-
Days Won
15
Content Type
Forums
Gallery
Downloads
Blogs
Events
Articles
Store
Posts posted by Admin
-
-
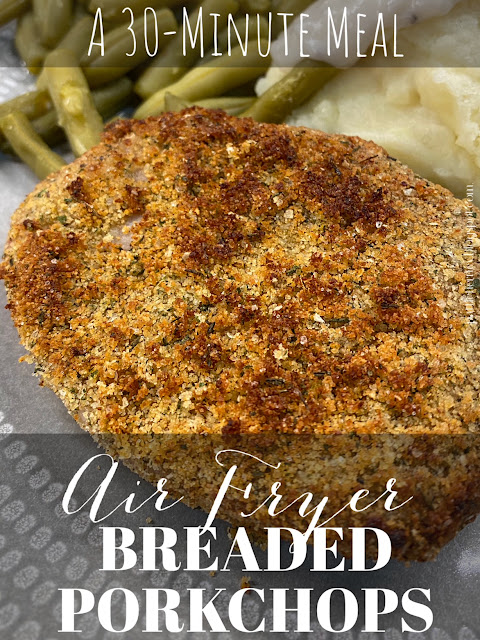 As I’ve mentioned before, I’m a bit of a novice when it comes to the air fryer, but I’m learning fast, and am really enjoying it. It honestly does make meal prep easy, and I have recently found that it is one of the best ways to cook a pork chop in order to keep it juicy.
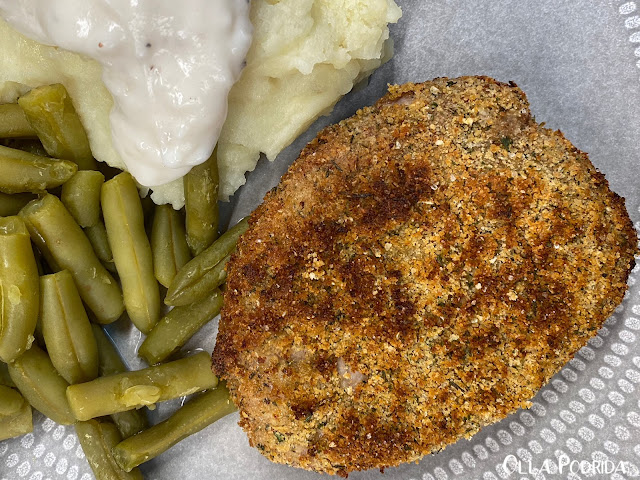
This recipe is super simple. I whipped up the breading, coated the chops, and stored them in the fridge until I was ready to make dinner. Super simple, and super good.

Air Fryer Breaded Pork Chops
Adapted from myairfryerkitchen.com
1 c. Italian breadcrumbs
1 T. cornstarch
1 t. garlic powder
½ t. freshly ground black pepper
½ t. onion powder
½ t. dried parsley
½ t. thyme
¼ t. smoked paprika
1 T. seasoned salt
4 boneless pork chops
Place dry ingredients (bread crumbs, cornstarch, salt & pepper, paprika, onion powder, parsley, seasoning salt and thyme) into a mini food processor and process until blended. Add 1 T. olive oil and mix until a sandy texture is created.
Rub each pork chop, and then coat with breading mixture.
Preheat the air fryer for 3 minutes to 400°F. (For easy cleanup use silicone or paper liners; in this case, I used both).
Put the pork chops into the air fryer for 7 minutes, then flip them over, and cook for another 7 minutes until the internal temperature of the pork chops reaches 145°F.
Take the pork chops out of the air fryer and let them cool on a cooling rack. (This will prevent the bottom coating of the pork chops from getting soggy as they cool.)
As an Amazon Associate I earn from qualifying purchases.
-
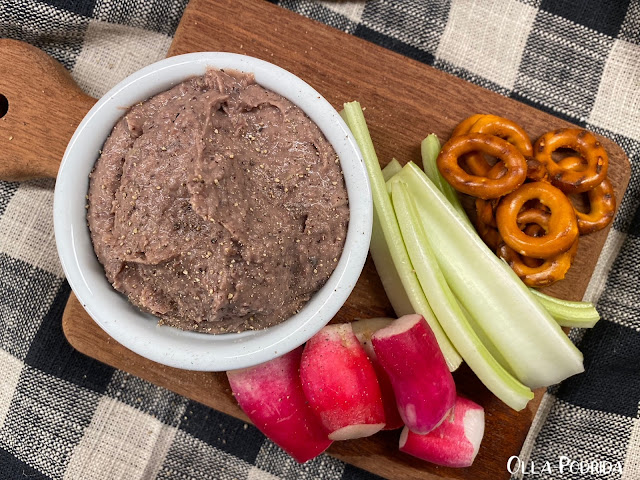
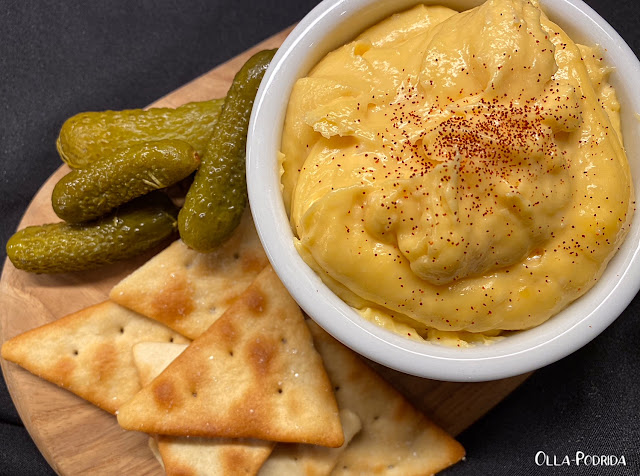
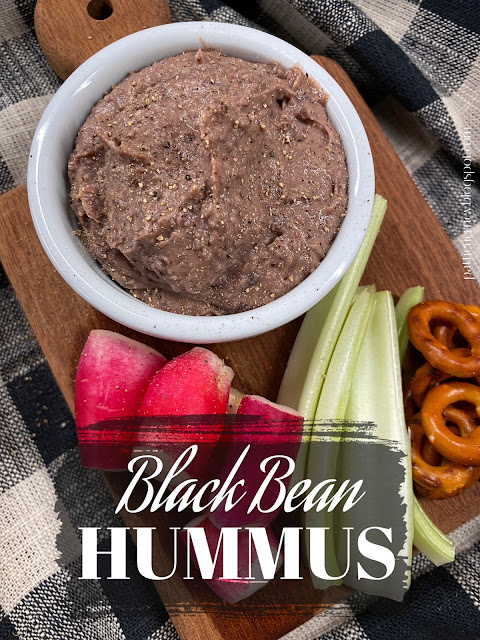 I love hummus! What I don’t particularly care for is tahini, generally one of the main ingredients in hummus. I’m not wild about the flavor or the price, or the fact that it seems to only come in large jars that ultimately end up getting shoved to the back of the fridge after I have it used it only once or twice — one or two tablespoons per use — where it mocks me every time I open the refrigerator door, and ultimately goes bad. That’s why this recipe is so appealing. No tahini! Made with fairly common pantry ingredients, this is an excellent snack, a great thing to serve when you have surprise guests (or guests that you’ve actually invited), and healthy to boot.
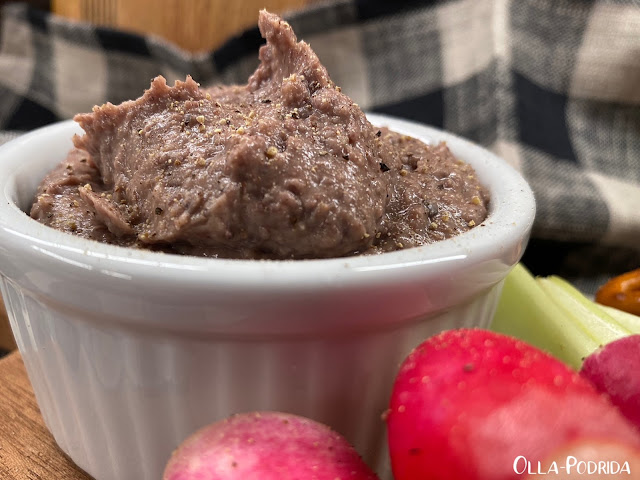
Black Bean Hummus
1 15-oz.can black beans, drained and rinsed
1 small clove garlic
1 scallion, both white and green parts
1½ T. fresh lemon juice
1 T. champagne vinegar
½ t. ground cumin
½ t. kosher salt
Freshly ground black pepper, to taste
Place all ingredients into the work bowl of a high-speed mini food processor. Blend until smooth. Refrigerate for one hour to allow flavors to meld before serving.
As an Amazon Associate I earn from qualifying purchases.
-
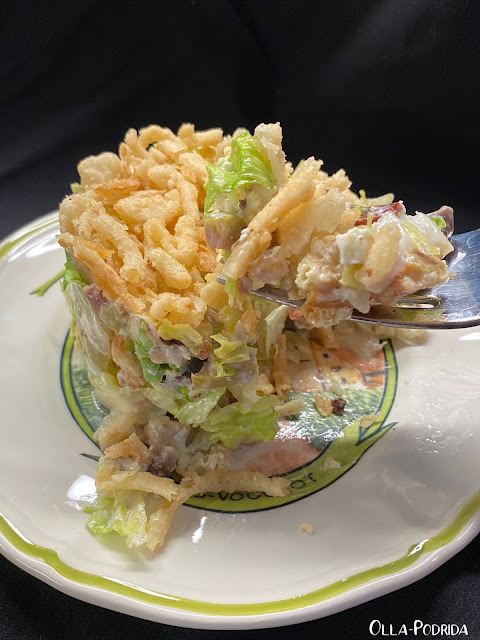
 I don’t know about the rest of you, but Ina has never let me down. Even with something as simple as the iconic wedge salad, Ina did it one better by slicing iceberg lettuce into “steaks,” as it were, in order to stretch further than the traditional wedge, make it heaps easier to eat, and a lot prettier. Here is her recipe, unadorned because it’s perfect as it is. The recipe is from her book Make It Ahead. The radishes in the picture I grew myself. I am most proud.
Crunchy Iceberg Salad with Creamy Blue Cheese
For the Dressing:
4 oz. Roquefort blue cheese, crumbled
⅔ c. good mayonnaise
⅓ c. plain Greek yogurt
1 T. sherry vinegar
Kosher salt and freshly ground black pepper
For the Salad:
4 tender inside celery stalks, trimmed & sliced crosswise ¼”
6 radishes, trimmed and sliced into thin rounds5 scallions, trimmed, white & green parts sliced ¼”
1 large head iceberg lettuce, wilted outer leaves removed
4 - 6 oz. Roquefort blue cheese, crumbled
For the dressing, place 4 oz. of blue cheese in a small bowl and microwave for 15 seconds, until it begins to melt. Place the mayonnaise, yogurt, warm blue cheese, sherry vinegar, ½ teaspoon salt, and ¼ teaspoon pepper in the bowl of a food processor fitted with the steel blade and process until smooth. Set aside or refrigerate until ready to use.
For the salad, combine the celery, radishes, and scallions in a bowl. Slice the whole head of lettuce across to make four ¾-inch-thick round disks and place each on a dinner plate. Spoon the dressing on the lettuce and sprinkle on a quarter of the vegetable mixture. Distribute the remaining crumbled blue cheese on the salads, sprinkle with fleur de sel and pepper, and serve.
 As an Amazon
Associate I earn from qualifying purchases.
As an Amazon
Associate I earn from qualifying purchases. -
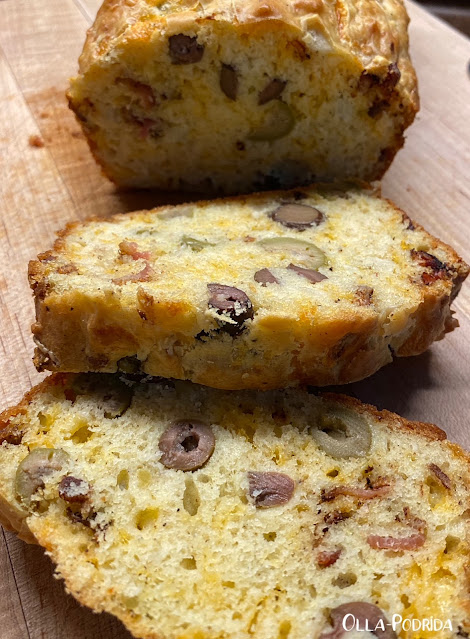
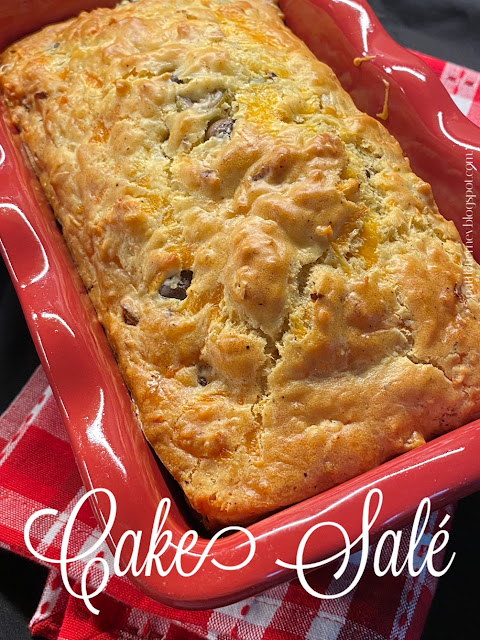 The French word for cake is gâteau, and that refers to a sweet cake. Cake Salé translates, literally, to “salty cake” that, by our standards, is really more of a savory quick bread. It was new to my experience, but I love the idea of a savory loaf, because I’m always looking for something interesting to pair with soup or salad, or to serve for lunch topped with a schmear of herbal cream cheese. What interested me the most here was the addition of olives. I LOVE olives! They are fabulous here, and are the one ingredient that must not be altered. As far as the other ingredients, you can get creative. Use chopped scallions instead of the shallot, use chopped ham instead of the bacon, use Gruyère instead of the sharp cheddar. Go crazy, have fun, and make this as soon as you can. It requires no special equipment, and, if you do your shopping and gathering of filling ingredients the night before, can whip it up in no time. The family is going to love this.
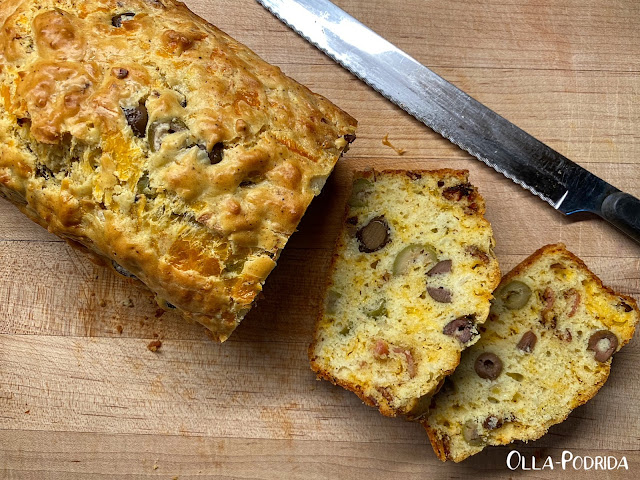 Cake Salé
 1 c. mixed olives, halved
1 small Melissa’s shallot, thinly sliced
1 c. shredded sharp cheddar cheese
3 slices thick-cut bacon, cooked and crumbled
1½ c. flour
2 t. baking powder
½ t. kosher salt
½ t. freshly ground black pepper
3 large eggs
½ c. whole milk
Preheat oven to 350ºF. Spray an 8”x4” loaf pan with cooking spray.
In a medium bowl place olive halves, sliced shallot, shredded cheddar, and the cooked and crumbled bacon. Toss to combine; set aside.
In a large, mixing bowl, place, flour, baking powder, kosher salt, add black pepper; whisk to combine. Make a well in the center of the flour mixture. Into the well place eggs, milk, and olive oil. Mix with a wooden spoon just until combined. It’s okay if there are a few lumps.
Add the olive mixture and fold together with a spatula until just combined; do not overmix. Transfer the batter to the prepared loaf pan and smooth the top.
Bake until golden brown and a toothpick inserted in the center comes out clean. Let cool for 15 minutes in the pan before turning out onto a wire rack to cool completely, about 1 hour. Slice, serve, and enjoy.
If you cannot consume the cake within three days, it can be frozen for up to three months.
As an Amazon Associate I earn from qualifyng purchases.
-
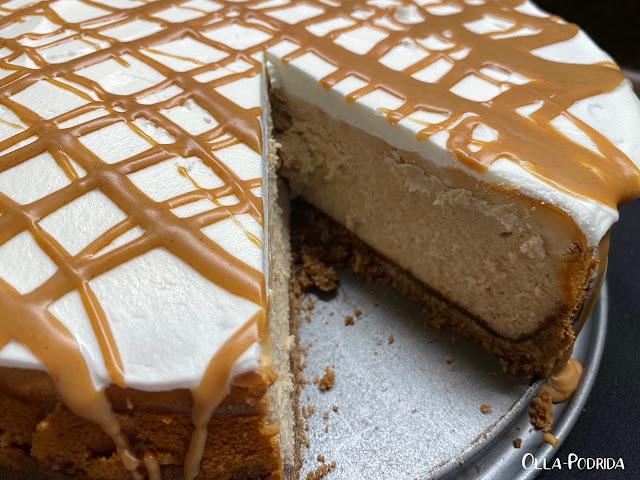
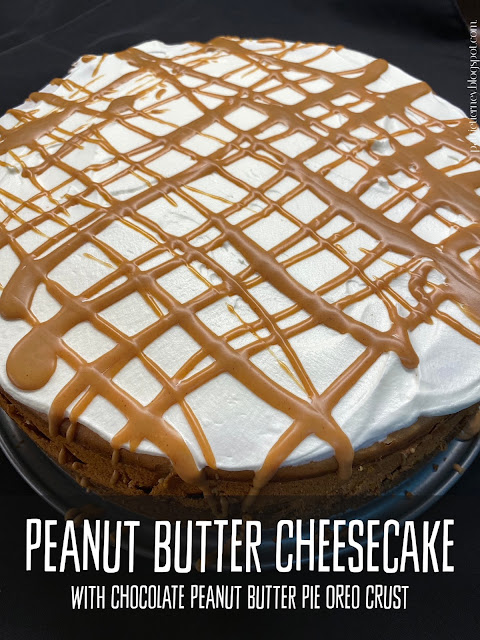 Lately I’ve been interested in doing a little baking. This interest was compounded after I purchased the new Chocolate Peanut Butter Pie flavor of Oreo cookies; I thought what a great crust it would make for a peanut butter cheesecake. There are a number of recipes for peanut butter, cheesecakes online, but I decided on this one, ultimately, because I liked the idea of a baked rather than unbaked cheesecake. I altered it to suit my taste and added the drizzle of melted peanut butter on the top. It makes a lovely presentation, and a wonderful dessert for the peanut butter fan in your life.
Peanut Butter Cheesecake
Adapted from Pioneer Woman
Crust:
22 Chocolate Peanut Butter Pie Oreos
5 T. unsalted butter, melted
Filling:
4 8-oz. blocks cream cheese, room temperature
½ c. sour cream, room temperature
1 c. granulated sugar
¼ t. kosher salt
4 large eggs, room temperature
½ c. heavy cream
Garnish:
2 T. Jif creamy peanut butter, melted
1 c. stabilized whipped cream, for topping
Crust:
Preheat oven to 350°F.
In the work bowl of a food processor, pulse Oreos (including the cream filling) into a fine crumb. While motor is running, pour in melted butter and pulse until the mixture looks like wet sand (thick and quite wet).
Pour the mixture into an ungreased 9-inch springform pan. With medium pressure using your hand, pat the crumbs down into the bottom and up the sides to make a compact, thick crust. (I like to use a tart tamper for this job.) Bake in preheated oven for 10-12 minutes. Cool completely.
Filling:
In the work bowl of a stand mixer fitted with a paddle attachment, beat the cream cheese and sour cream on medium-low speed until totally smooth, about 3 minutes. Add the peanut butter, sugar, and salt. Beat on medium-low speed until completely combined. With the mixer running, add the eggs, one at a time until each is fully incorporated, mix in heavy cream. Scrape down sides in the process. Pour the batter into the crust.
Bake for 70 - 80 minutes, or until the filling is puffed and the center slightly wobbles when the pan is gently shaken. Turn off the oven, crack the door a few inches, and let cool in the oven for 1 hour. Remove and finish cooling to room temperature
Chill the cooled cheesecake for at least 6 hours or overnight. When ready to serve, run a thin knife or offset spatula around the sides of the cheesecake to release it from the pan. Release and remove the side of the springform pan and transfer to a serving plate.
Spread a layer of whipped cream over the top (pipe rosettes around the edge if you like), and drizzle with melted peanut butter.
 As an Amazon Associate I earn from qualifying purchases.
 -
 I am one of those old people who get upset when there’s a change in routine, similarly to the way my grandmother got upset when Walter Cronkite took vacation and was replaced by Roger Mudd. In my case, it was due to baseball. First of all, this season the Cardinals are a pathetic team. Second, the game on Sunday was scheduled for the shockingly early hour of 11 AM CDST. Lastly, it wasn’t shown on its regular network, but on Peacock TV. So, let me just say that my day did not start off well. When things like this happen, and I feel myself slipping into Bizarro World, I start thinking about recipes I like, and how I can mix them up and turn them into something entirely different. Sports make me think of jalapeño poppers. The early game time made me think of breakfast, ergo, jalapeño popper quiche. I had no idea what I was doing, but let me tell you, the outcome was MAGNIFICENT! This is so good! I think it’s also a quiche that a man would be proud to eat.
.PNG)
Jalapeño Popper Quiche
1 pie crust*
4 large eggs
1 c. heavy cream
Salt and freshly ground black pepper, to taste
4 slices thick-cut bacon, cooked and crumbled, reserve some for garnish**
4 oz. cream cheese, cubed
2-3 Melissa’s pickled jalapeños, seeded and chopped***
1 c. shredded cheddar, divided
3 scallions, chopped, divided
Preheat the oven to 350°F. Prepare the pie crust if making your own; set aside.
In a medium mixing bowl, vigorously whisk eggs and heavy cream; season with salt and pepper.
Scatter bacon, cream cheese, jalapeños, half of the cheddar, and half of the scallions on the bottom of the pie crust. Carefully pour egg mixture into the crust.
Bake the quiche for 40-45 minutes, or until the eggs are set. While the quiche is still warm, add the other half of the cheddar cheese on top and allow cheese to melt. Garnish with chopped bacon and scallions. Allow to stand for ten minutes before slicing and serving.
* I used frozen because it was convenient
** Go to the extra effort of doing this in a pan on the stove, and cook it very dark, so that you get that deep, rich, broiled bacon flavor as you would on a traditional popper.
*** Use pickled jalapeños because they have more flavor here.
As an Amazon Associate I earn from qualifying purchases.
-
.PNG) Some people might say that I’m curious, I’m going to call it exactly what it is, nosy. I love looking into other people’s homes to see how they live. A home can tell you so much about a person. In fact, a quick glance can tell me if I want to be friends with that person or not. A neighbor once insisted that I come see her home. Clearly, she was proud of it, so I agreed. She took me from room to room explaining every detail. The problem is, it was like walking into a void. The home had no life. It looked as though no one was living there. There were no books. There were no plants. There was nothing at all unique or specific to that person. Nothing was out of place. The iPad was on a stand on a bedside table. Pictures had been hung in groupings with mathematical precision. Kitchen counters were devoid of any and all kitchen equipment. Frankly, it made me uncomfortable.
Some people might say that I’m curious, I’m going to call it exactly what it is, nosy. I love looking into other people’s homes to see how they live. A home can tell you so much about a person. In fact, a quick glance can tell me if I want to be friends with that person or not. A neighbor once insisted that I come see her home. Clearly, she was proud of it, so I agreed. She took me from room to room explaining every detail. The problem is, it was like walking into a void. The home had no life. It looked as though no one was living there. There were no books. There were no plants. There was nothing at all unique or specific to that person. Nothing was out of place. The iPad was on a stand on a bedside table. Pictures had been hung in groupings with mathematical precision. Kitchen counters were devoid of any and all kitchen equipment. Frankly, it made me uncomfortable..PNG) On the other hand, family friend Betty, sadly now gone, whom I had known all
my life, had an imperfect home. Plants, dog, books that had to be moved off of
chairs so that visitors could sit down, craft projects, art supplies, kitchen
equipment, souvenirs from her travels, everything in her home gave off such a
welcoming vibe. Once I entered, I felt no need to ever leave, unlike the
previously described home where all I could think of was bolting for the door.
On the other hand, family friend Betty, sadly now gone, whom I had known all
my life, had an imperfect home. Plants, dog, books that had to be moved off of
chairs so that visitors could sit down, craft projects, art supplies, kitchen
equipment, souvenirs from her travels, everything in her home gave off such a
welcoming vibe. Once I entered, I felt no need to ever leave, unlike the
previously described home where all I could think of was bolting for the door..PNG) I mention this because Abrams Books recently released a wonderful volume called Uncommon
Kitchens, A Revolutionary Approach to the Most Popular Room in the House, that is an absolute delight. I consider my own kitchen
to be rather uncommon, what with a giant stained glass window from a local pub
perched high above the cabinets, as well as a huge Gothic arch mounted over
the pantry door that once hung over my parents’ stone fireplace, so this book
really spoke to me.
I mention this because Abrams Books recently released a wonderful volume called Uncommon
Kitchens, A Revolutionary Approach to the Most Popular Room in the House, that is an absolute delight. I consider my own kitchen
to be rather uncommon, what with a giant stained glass window from a local pub
perched high above the cabinets, as well as a huge Gothic arch mounted over
the pantry door that once hung over my parents’ stone fireplace, so this book
really spoke to me. .PNG) Edited by Sophie Donelson former editor-in-chief of House
Beautiful magazine, with contributions from numerous design experts -- Justine Blakeney,
a personal favorite -- among them, this book takes you where you have never
been before by way of kitchen makeovers both large and small. It encourages you
to work with what you have to update your kitchen even if you have virtually no
budget in which to do so. There are ways to make improvements without making
big sacrifices. Essentially, it’s less about new appliances and granite
countertops than it is about innovation and personality.
Edited by Sophie Donelson former editor-in-chief of House
Beautiful magazine, with contributions from numerous design experts -- Justine Blakeney,
a personal favorite -- among them, this book takes you where you have never
been before by way of kitchen makeovers both large and small. It encourages you
to work with what you have to update your kitchen even if you have virtually no
budget in which to do so. There are ways to make improvements without making
big sacrifices. Essentially, it’s less about new appliances and granite
countertops than it is about innovation and personality. .PNG) Think about it. As we get older, we update our clothes and make
up. Sure, some of us may want to shore up parts of us that have seriously
headed south, but lacking that, there are ways to make exceptional changes in
the most positive of fashions that will add intrigue and attractiveness, while
making ourselves feel so much better. That same principle has been applied in
this book. Think outside the box. Bring some of your favorite treasures,
artwork, and colors into the kitchen. We spend a good bit of our lives in the
kitchen. Why shouldn’t it contain the things that we love the most?
Think about it. As we get older, we update our clothes and make
up. Sure, some of us may want to shore up parts of us that have seriously
headed south, but lacking that, there are ways to make exceptional changes in
the most positive of fashions that will add intrigue and attractiveness, while
making ourselves feel so much better. That same principle has been applied in
this book. Think outside the box. Bring some of your favorite treasures,
artwork, and colors into the kitchen. We spend a good bit of our lives in the
kitchen. Why shouldn’t it contain the things that we love the most? .PNG)
At the heart of it, this book is bold! You are going to see things that you like, you are going to see things that you don't like, and you are going to see things that you REALLY like. The great thing about this book is that it is going to make you feel good about your own personal style. Take this book and run with it. Be brave, be bold, but most of all be you. Let your house reflect who you really are. After all, that's what home is.
As an Amazon Associate I earn from qualifying purchases.
Disclaimer: I received a complimentary copy of this book from Abrams Books as a participant in their Abrams Dinner Party Program for 2022-2023.
-
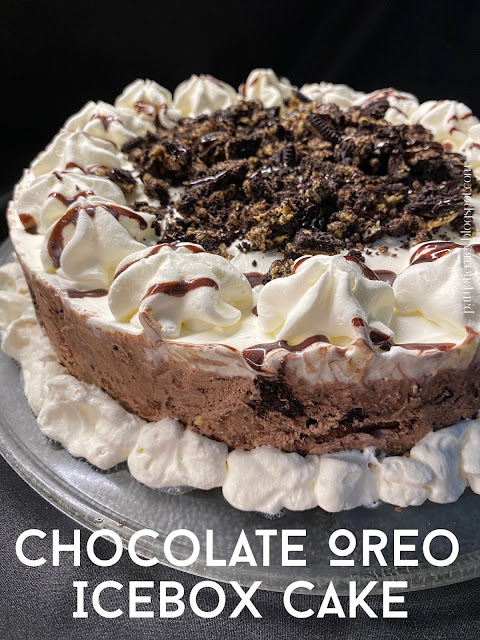
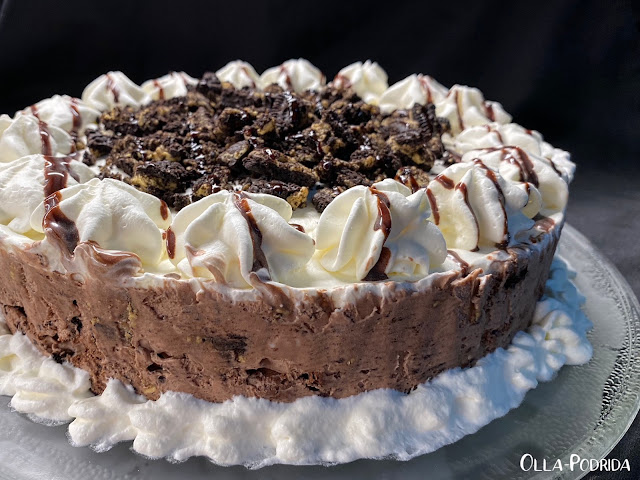
This is a recipe that I have wanted to try for a long time, but never so much as after I tried the new Java Chip Oreos. If you haven’t tried those, you absolutely must! They are so good. The chocolate cookie with java filling and crunchy toffee bits is cookie perfection. Naturally, you can make this recipe as originally written, with plain Oreos, but why would you do it when Java Chip Oreos are available?

Chocolate Oreo Icebox Cake
Slightly adapted from beyondfrosting.comFOR THE CAKE
8 oz. cream cheese, room temperature
1½ c. heavy whipping cream
1 t. vanilla extract
1 c. powdered sugar
2 T. cocoa powder
1 t. espresso powder
24 Java Chip Oreos, crushed
1 box (14.4 oz) chocolate graham crackers
FOR THE TOPPING:
1¾ c. heavy whipping cream
1¼ c. powdered sugar
Hershey’s Syrup, for drizzle
6 Java Chip Oreos, crushed
Line the bottom of a 9-inch springform pan with parchment paper. Align the chocolate graham crackers in the bottom of the pan, cutting crackers as needed to fit, but the more large/whole pieces you have, the better structure they will provide.
Place the Oreos in a large Ziploc bag and use a rolling pin or another heavy object to crush, not pulverize, the Oreos; set aside.
Using an electric mixer, beat the cream cheese for 2 to 3 minutes until it is completely smooth. Add ¼ cup of the heavy whipping cream and beat until the cream cheese resembles a liquid mixture. Then add remaining heavy whipping cream and vanilla extract and beat on medium-high speed. Once the mixture reach soft peaks. Then add the powdered sugar and cocoa powder and beat until stiff peaks form. Fold the crushed Oreos to the chocolate mousse until well incorporated.
Divide the chocolate Oreo mousse in half. Spread half of the mousse over the bottom layer of graham crackers. It helps if you hold the graham crackers in place with your fingers if they are sliding around. Next, add a second layer of graham crackers and spread the remaining mousse. Finally, add the third and final layer of the graham crackers.
FOR THE TOPPING
Place the mixing bowl and whisk attachment in the freezer for 5 to 10 minutes to chill. Pour the heavy whipping cream into the chilled bowl and use an electric mixer to beat the heavy cream at medium-high speed until soft peaks start to form. Slowly add the powdered sugar and continue beating at high speed until stiff peaks form. Frost the top with a thin layer of whipping cream, and then pipe a border around the outside edge.
Cover this with aluminum foil and freeze for 2 to 4 hours or you can choose to keep this in the refrigerator, but allow at least 4 hours for the graham crackers to soften.
Prior to serving, remove the icebox cake from the freezer and allow it to thaw for 20 minutes. Crush 6 Oreos and sprinkle over top of the cake. Drizzle Hershey’s Syrup over the Oreos.
As an Amazon Associate I earn from qualifying purchases.
-
 I have never had the pleasure of eating at Ruth’s Chris Steakhouse. It’s not that I haven’t wanted to; it’s just that the opportunity never arose. Truth be told, the late Mr. O-P used to be quite the steak maker, and often when we dined at area steakhouses, we would return home disappointed. I do like to keep my eye out for copycat recipes, though, and this one intrigued me. First of all, I love a chopped salad. I know it’s old school, but I don’t care. There’s just something simple, homey, crunchy, and delicious about a chopped salad, not to mention the fact that it’s easy to get onto a fork and into your mouth rather than, as has happened with some of those froufrou salads, wear it like a chest plate. Second, I love the way this is served. Ruth’s Chris garnishes with two halves of a cherry tomato. I didn’t have any, so I just left it as is.
If you’ve never used a ring mold, let me tell you it is the simplest thing ever. Just put it on your serving plate, fill it with salad, and tamp it down, and slowly lift up the ring and there is your beautiful salad. It also works quite well with rice.
This is an exceptionally good combination of ingredients. Make it fancy, serve it simply, or enjoy it as a main dish. Don’t let this one get by without giving it a try.
 Ruth's Chris Chopped Salad Copycat
As seen on lakesidetable.com
Salad Dressing
½ c. sour cream
2 fresh lemons, juiced
1 t. kosher salt
½ t. garlic powder
1 c. finely chopped fresh basil
Salad
½ head Iceberg lettuce chopped
6 slices bacon cooked and chopped
1 small radicchio, chopped
1 c. croutons, chopped
½ c. green olives, chopped
½ c. Melissa’s heart of palm, chopped
2/3 c. blue cheese, crumbled
4 medium mushrooms, chopped
2 boiled eggs, chopped
½ red onion, minced
Topping & garnish
1 c. crunchy fried onions
8 cherry tomatoes, halved
Salad Dressing
Mix all the salad dressing ingredients together and set aside.
Salad
Gently mix all of the ingredients together except for the crispy fried onions and cherry tomatoes.
Pour salad dressing over the salad and mix together until thoroughly combined.
Divide salad between 4 plates and top with crispy fried onions and garnish with cherry tomatoes.
OR place the metal salad ring mold on the salad plate and fill it with salad. Then with the bottom of a glass, gently tap the salad down to compress it. This will help it keep its shape.
Remove the glass and top the salad with crispy onions. Then using the bottom of the glass again to keep the salad on the plate, bring the ring up, and remove the ring.
Garnish with tomatoes.
As an Amazon Associate I earn from qualifying purchases.
-
 There’s an old movie from 1966 starring Cary Grant, Jim Hutton, and Samantha Eggar, called “Walk, Don’t Run.” It takes place during the summer Olympic Games in 1964 and focuses on the housing shortage. Two men, Grant and Hutton, are forced to share a small apartment in Tokyo with the innocent and lovely Eggar. In one scene that I remember to this day, Cary Grant is making coffee, because it became obvious to him early on that neither Hutton nor Eggar could do it well enough to suit him. This was in the days of percolators (remember those?), Grant opens up a can of coffee grounds, pours it into the basket of the percolator filling it up, and levels it off with his index finger. Later, when he drinks this hearty brew he says, “That’s what I call coffee.” I have to agree.
 My methods are a bit more modern and sophisticated than were
his, but I want coffee strong enough to stand a spoon up in it. That’s why I
never go to coffee houses. They never make the coffee strong enough to suit me,
and I always question the cleanliness of their equipment.
My methods are a bit more modern and sophisticated than were
his, but I want coffee strong enough to stand a spoon up in it. That’s why I
never go to coffee houses. They never make the coffee strong enough to suit me,
and I always question the cleanliness of their equipment.Despite that, I must say that I am fascinated by some of their concoctions. Because drinking cold brew every afternoon at 3 PM has become as much a part of my lifestyle as waking up in the morning, I was eager to try a copycat recipe that I found on the web for Starbuck’s Iced Cinnamon Dolce Latte. It’s simple enough, just add a tablespoon (I use more) of cinnamon syrup to cold brew coffee, top it off with a splash of cream, and you have a wonderful, refreshing beverage. I drink cold brew all through the winter, outside temperatures don’t dictate whether I drink coffee or not. If you only drink it during the summer, you'll need to add this one to your repertoire. It’s really good.

Starbuck’s Iced Cinnamon Dolce Latte Copycat
1/3 c. water
1/3 c. brown sugar, packed
2 t. vanilla extract
1 t. cinnamon
Double shot espresso
Ice
¼ c. whole milk
In a small saucepan, combine the water, brown sugar, vanilla, and cinnamon. Cook for 3-5 minutes until it comes to a simmer. Remove the syrup from the pot into an airtight container.
Fill your favorite glass with ice. Add espresso and 1-2 tablespoons of cinnamon sugar syrup. Stir vigorously for 30 seconds. Pour in milk and enjoy.
 As an Amazon Associate I earn
from qualifying purchases.
As an Amazon Associate I earn
from qualifying purchases. -
 When it comes to taking down Christmas decorations after the holiday, I have found that there are two schools of thought. There are the people who, when the clock strikes midnight on Christmas Day, already have half of the ornaments off the tree; and then there are the people who keep it up through Epiphany and (Horrors!) beyond. I am of the former camp. I consider it a personal failure if I don’t have all of the decorations down, everything put away, and not a speck of red in the house by the morning of New Year’s Eve. This year I beat that goal by a day. Needless to say that it made me proud.
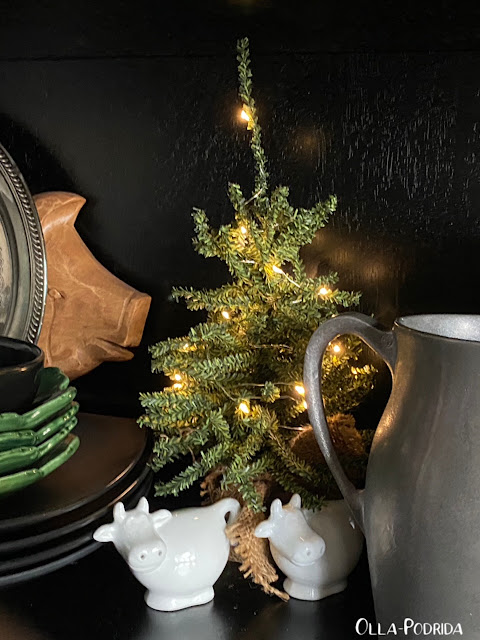 Because of all of the bold colors of Christmas, I like a neutral palette for the next month or so, generally up until Valentine’s Day when I bring out the pink and red. Having stripped the tables of their entire holiday decor, I set to work on what I always refer to as the “winter hutch.” Here’s what it looks like for the New Year.
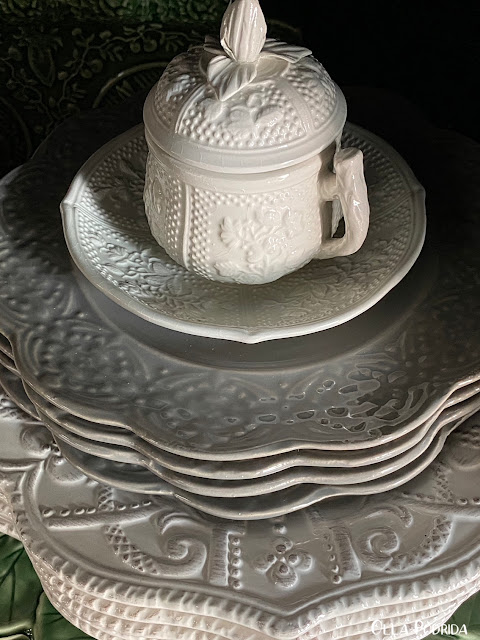
I have recently come to embrace gray, so I have added it to the hutch. Because of my love of plants and the natural world, no matter the holiday, the hutch always has a touch of green, as you can see here in the Bordallo Pinheiro cabbage leaf chargers; they are a permanent fixture.
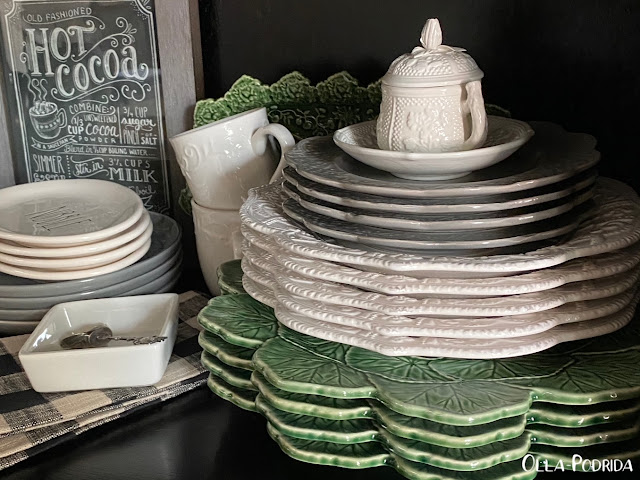
On top of them are the white plates in the Blanc Amelie pattern from Maison Versailles. I love these plates because not only do they have wonderful, curvy edges, but a white on white raised pattern. These are topped with Pfaltzgraff salad plates a part of their “Gia” pattern. (I have recently become very impressed with Pfaltzgraffbecause they are selling place settings of dishes in different colors and patterns so that you can easily build your own plate stack with just one purchase.)
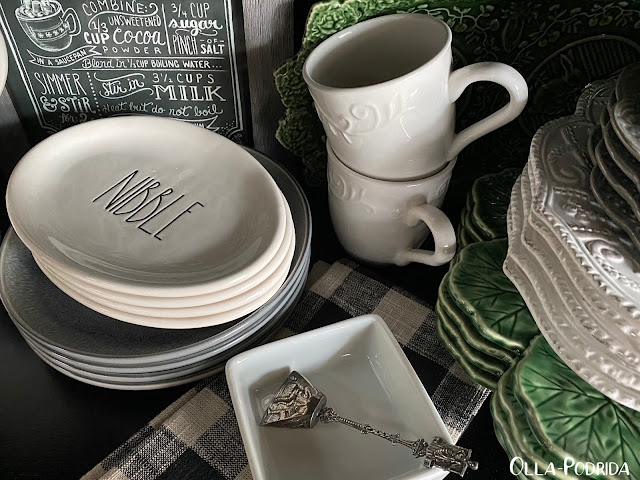
These are topped off with an adorable Mottahede pot de crème.
 I like to mix modern with antique, so have placed an inherited sugar spoon on top of a modern white ceramic a fruit dish.
 Rae Dunn "Nibble" plates (personal faves) rest atop a new set of glazed gray stoneware bowls.
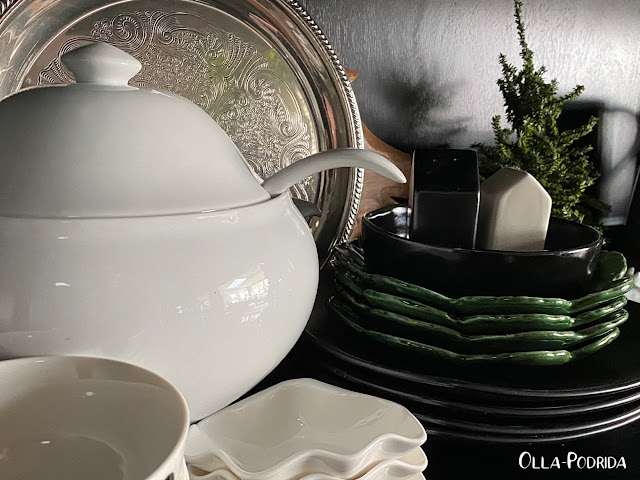
On the other side of the hutch I have a white pottery barn tureen, flanked by rustic black stoneware, simple salt and pepper shakers, and one of my new favorite serving dishes shaped like oyster shells. They are wonderful dipping bowls, but are absolutely superb for serving coquille Saint Jacques.
By the time this posts, I will have no doubt have swapped one or two things as the mood hits. After all, isn’t that part of the fun?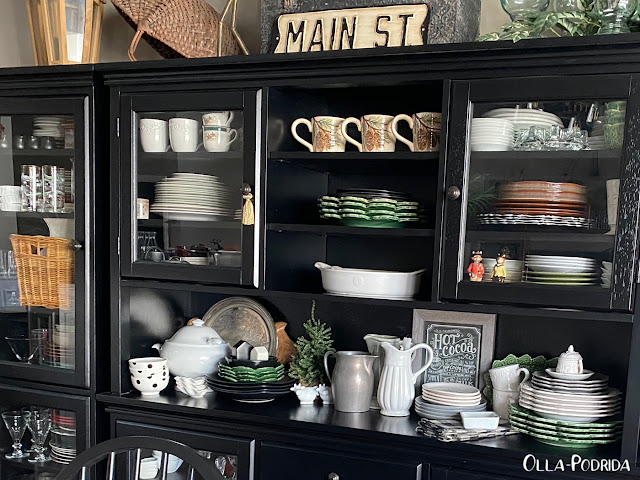
As an Amazon Associate I earn from qualifying purchases.
-

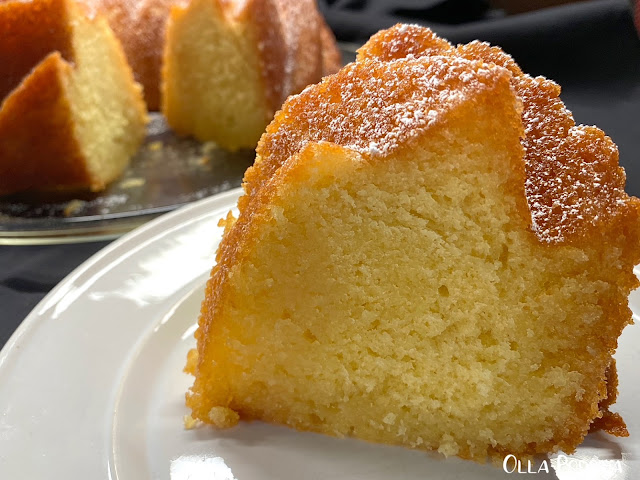
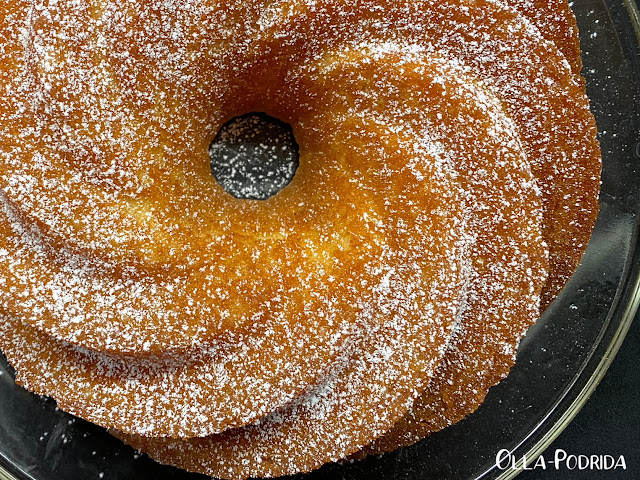
As often happens during the month of January, I’ve been going through my kitchen cabinets trying to assess what I have, what I really need, and what I really don’t. In excavating the liquor cabinet I discovered that I had two brand new bottles of amaretto. I’m not entirely sure how that happened, but I vowed to put it to use in a new and different way. For whatever reason I started thinking about my mother’s rum cake and it caused me to wonder how such a cake would be if I replaced the rum with amaretto. These days with the prices of everything so astronomically high, it’s not often that I experiment, but I couldn’t imagine any way in which this wouldn’t work. I was right! If you are an almond lover like I am, you will be over the moon. If not, you’re still going to love it. I allowed it to soak overnight (an absolute must!), and could hardly wait to extract it from the baking pan first thing in the morning. I ended up having a big slice with a cup of coffee. What a way to start the day! I took a hefty slab of it over to my number one son; he and his wife loved it as much as I did. Never have I had a pound cake with such intense flavor as this one.
 Amaretto Pound Cake
2 c. flour
1½ c. sugar
1 3.4-ounce box instant vanilla pudding mix
2 t. baking powder
1 t. salt
8 T. unsalted butter, softened
½ c. vegetable oil
½ c. whole milk, room temperature
4 large eggs, room temperature
½ c. Amaretto
2 t. almond extract
Syrup
8 T. unsalted butter
¼ c. water
1 c. sugar
¼ t. kosher salt
½ c. Amaretto
½ t. almond extract
Preheat the oven to 325°F. Spray the heck out of a 10- to 12-cup Bundt pan with Baker’s Joy; set aside.
Place the flour, sugar, pudding mix, baking powder, salt, butter, and vegetable oil in the work bowl of a stand mixer. Beat, at medium speed, until the mixture appears sandy. Beat in the milk, and then beat in eggs, one at a time. Scrape down, and stir in the amaretto and almond extract.
Pour the batter into the prepared pan. Bake for 50 - 60 minutes until cake tests done. Remove the cake from the oven. Leave the cake in the pan to cool slightly while you make the syrup.
To make the syrup:
In a medium-sized saucepan combine the syrup ingredients, except almond extract. Bring to a rapid boil then reduce to a simmer and cook, without stirring, for about 5 to 8 minutes, until the syrup thickens slightly. Remove from the heat and stir in the almond extract.
Use a long skewer to poke holes all over the cake. Keep the cake in the pan and slowly drizzle the syrup over the cake (still in the pan). Do this in increments in order to allow the syrup to soak in.
Cover the pan loosely with plastic wrap and allow the cake to sit overnight at room temperature to soak in all of that luscious syrup. When ready to serve, loosen the edges of the cake and invert onto your serving plate. If the cake won’t release, don't force it. Place it in the oven, turn the oven to 350°F, and warm for about 10 minutes, to soften the sticky syrup. Remove the cake from the oven, and tip it onto the serving plate.
Store at room temperature, covered, for several days. Freezes well.
As an Amazon Associate I earn from qualifying purchases.
-

I love mushrooms, all types, and I’m always looking for a new way to use them. When I spotted this recipe, I knew that it was one I needed to try. Unique and different, it makes a wonderful starter or side dish for any meal. With the addition of tomatoes and fresh spinach, the colors are such that it would be perfect for a holiday table. I’m going to be making this again in the summer using my own homegrown produce that will certainly enhance the flavors. You’ll want to eat this one with a spoon so that you don’t miss a drop of the wonderfully tasty sauce.

Tuscan Butter Mushrooms
Adapted from delish.com
4 T. butter
1½ t. Melissa’s minced garlic
1 T. tomato paste
1 lb. mushrooms, cleaned
1 c. cherry tomatoes, halved
¾ c. heavy cream
¼ c. freshly grated Parmesan cheese
Kosher salt
Freshly ground black pepper
Pinch crushed red pepper flakes
3 c. fresh spinach
In a large skillet over medium heat, melt butter. Add garlic and tomato paste, and cook until fragrant, 1 minute. Add mushrooms and tomatoes, and cook until mushrooms are tender and tomatoes are starting to burst, 5 minutes.
Add heavy cream and Parmesan and season with salt, pepper, and a pinch of red pepper flakes, and then bring to a simmer. Add spinach and cook until sauce is thickened and spinach is wilted, five minutes.
Yield: 4 servings
As an Amazon Associate I earn from qualifying purchases.
-
 If you’re anything like me, and like to have one or two vegetables with your evening meal, by week’s end you have a lot of leftover vegetable portions that are often destined for the bin. I told myself that this year I was going to do my very best to not waste as much food as I have in the past, and this casserole is the result. It really is delicious, and the surprising outcome of trying to make do with every little leftover bit. If you keep something like this in mind for the end of the week, it can help you with meal planning earlier in the week because you can make vegetables that you know will combine well into this casserole. Give it a try, and let me know what you think. My guess is that you could easily pass this off on company, and they’d love it!
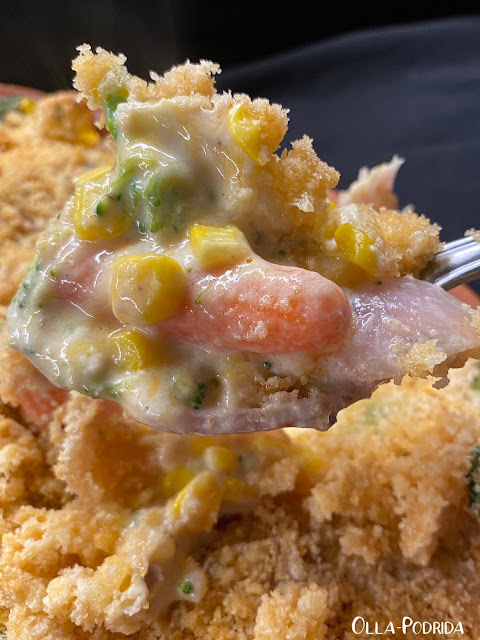
Mixed Vegetable Casserole
6 c. mixed vegetables*
1 10.6-oz. can cream of mushroom soup
½ c. sour cream
1 large egg, beaten
¼ c. heavy cream
¼ t. onion powder
¼ t. parsley flakes
¼ t. garlic powder
¼ t. smoked paprika
½ t. salt
½ t. freshly ground black pepper
2½ c. shredded cheddar cheese, divided
1 sleeve Ritz crackers, crushed
6 T. melted butter
Preheat oven to 375°F. Spray a 9” x9” casserole dish (or similarly sized dish) with PAM; set aside.
If vegetables are uncooked, blanch for five minutes; drain.
In a medium mixing bowl, stir together soup, sour cream, egg, cream, herbs and spices, and 2 cups of the cheese. Fold in reserved vegetables. Sprinkle the remaining cheese over the top, and cover all with the cracker crumbs. Drizzle melted butter on top.
Bake for 25 to 30 minutes until the edges are bubbly at the top is brown. Cover with foil if it shows signs of burning.
*I use broccoli, cauliflower, baby carrots, red onion, and corn.

As an Amazon Associate I earn from qualifying purchases.
-

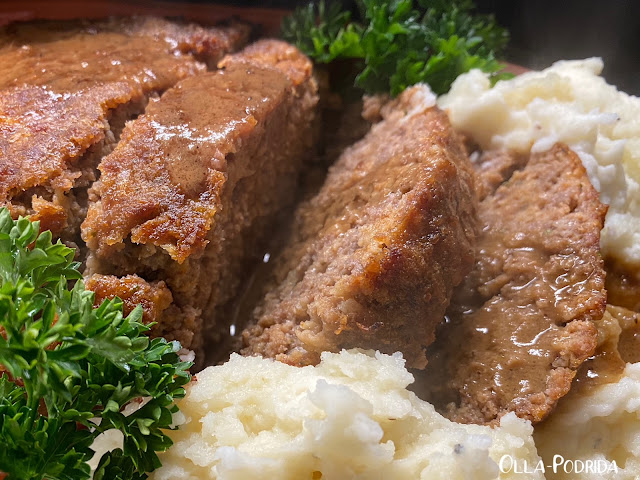
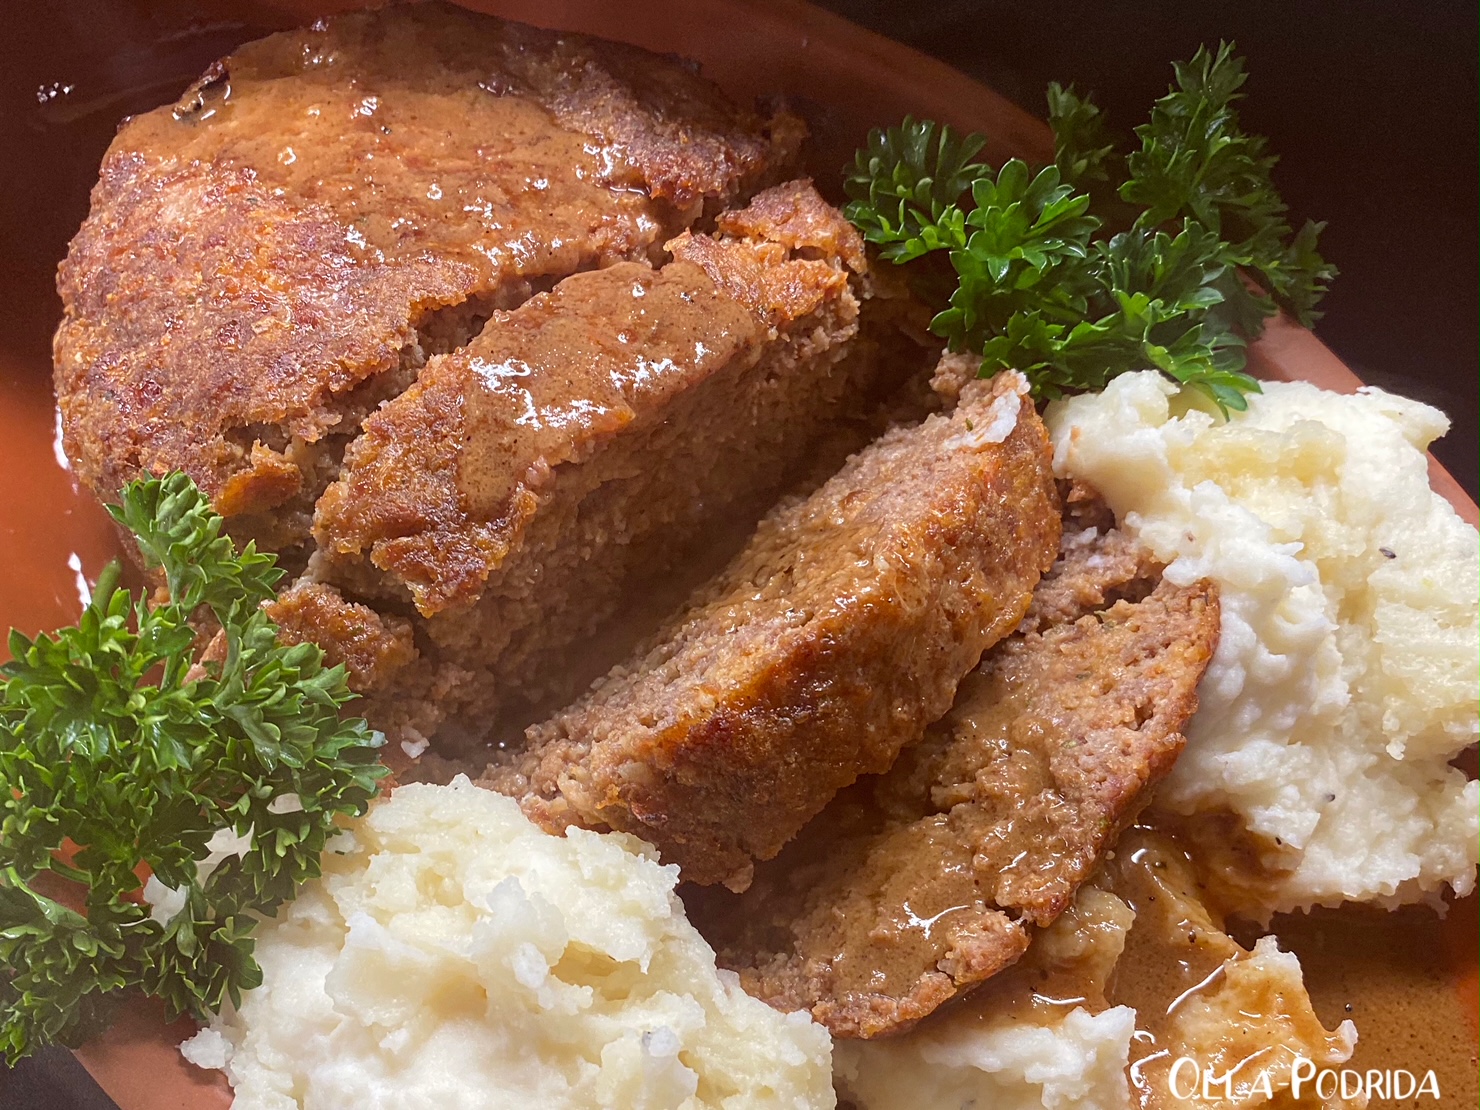
This is a recipe that I have been tinkering with for sometime. I am a fan of meatloaf, and I have long thought that it doesn’t get it’s due. It is easy to make, can be made ahead and baked later — even frozen —, and can be seasoned in so many different ways as to incorporate a variety of cuisines. This Creole meatloaf is a particular favorite because it has a lot of flavor. Depending upon my mood, I have upped the amount of Creole seasoning to as much as a tablespoon. Tinker with it according to your own tastes. I had leftover sauce from Bourbon Steak that I made earlier in the week and drizzled it on top. Excellent!
Creole Meatloaf
1 lb. ground chuck
1 small Melissa’s shallot, finely chopped
¼ c. finely grated Parmesan cheese
1½-2 t. Creole seasoning
¼ c. spicy ketchup
1 large egg
1/3 c. Italian seasoned breadcrumbs
Preheat oven to 375°F. Spray a 9” x 5” loaf pan with PAM; set aside.
Place all ingredients into a large mixing bowl. Put on a pair of kitchen gloves and mix well with hands. Be sure the breadcrumbs are well incorporated.
Press the mixture evenly into the pan. Bake for 60 minutes. Remove from the oven and let rest in the pan on a cooling rack 10-15 minutes before turning out onto a paper towel-lined baking sheet to drain. Remove to a cutting board to slice.

As an Amazon Associate I earn from qualifying purchases.
-

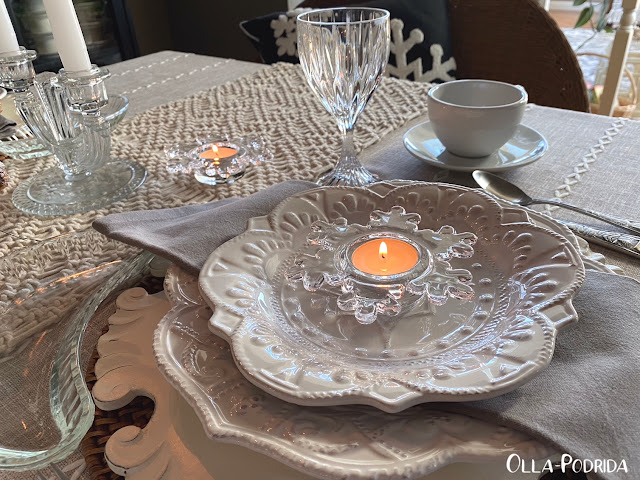
After all of the fairy lights, and bold colors of Christmas, I am more than ready for serene. I want soft tones, muted colors, peace, and quiet.
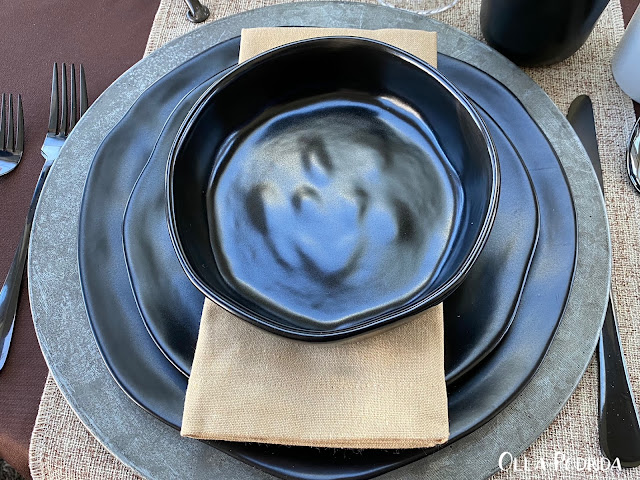
The first thing I thought of when I unwrapped this beautifully packaged black stoneware dinnerware set was that it reminded me of something that the Flintstones may have used at a fancy dinner party. That, or something excavated from an archaeological dig; I mean both of these statements in the nicest way. This stuff is gorgeous! In my opinion, it is a work of art. The free-form style of the plates and bowls is pure poetry. The cups that work for a hot beverage or cold without the handle are inspired. This unique pottery is certain to draw lots of comments.

It can be dressed up for something a bit fancier, or down for something delightfully bohemian. It will pair with absolutely any color that you happen to have on hand; ergo will work for any occasion, at any time of the year. It can be flashy or subtle based upon linens and accessories, like this darling cup from a set of Polka Dot dinnerware.
.PNG) I was going for subtle, so that the food could sing. A wonderful way to highlight what you’re serving is to do so on a dark, subtle background.
I was going for subtle, so that the food could sing. A wonderful way to highlight what you’re serving is to do so on a dark, subtle background. 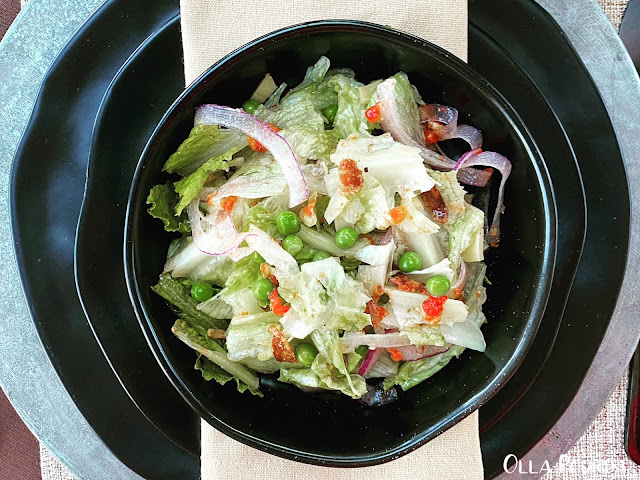
I used a chocolate brown tablecloth, topped with some of my favorite chargers of tin, and used beige linen napkins.
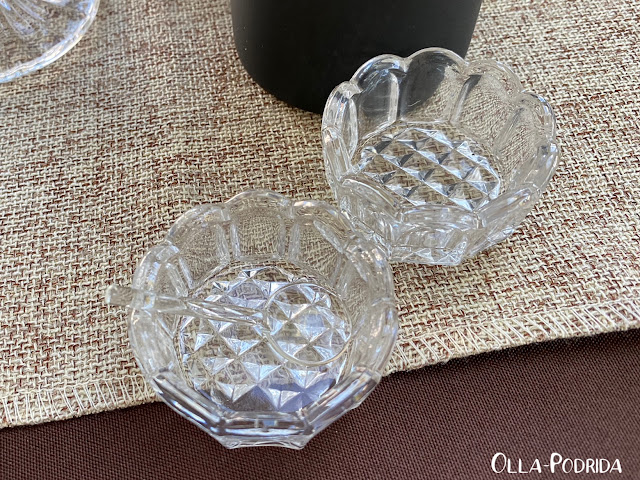
The polished black flatware gives it a bit of an elegant feel as does the crystal in the Mikasa “Parklane” pattern. A bit of added sparkle comes from the saltcellar set a table center.
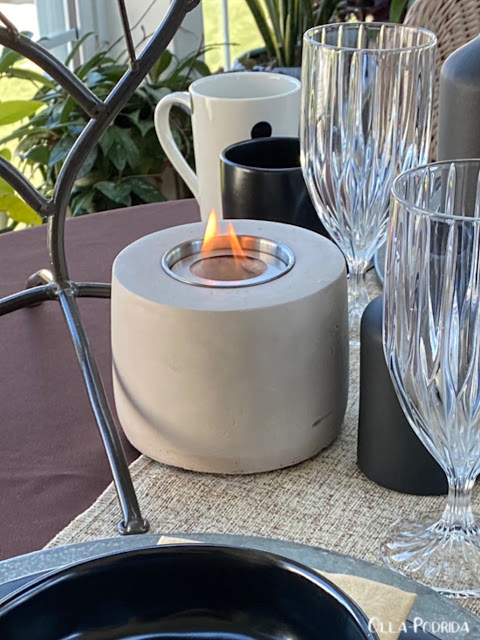
The centerpiece consists of the candle holder (once my mother's) and one of my new favorite things, a Table Top Fire Pit; it runs on rubbing alcohol, can you believe it?! I tend to like a busy centerpiece even at the simplest of tables, so I added a trio of black vases. Come spring those vases will be used to force branches (hopefully forsythia) and that will make a nice contrast.
 I wanted to do this understated tablescape to start off the New Year to show you how beautiful quiet can be. May the peace of the New Year be with you…and your table settings.
As an Amazon Associate I earn from qualifying purchases.
This post is linked to: Tablescape Thursday
-
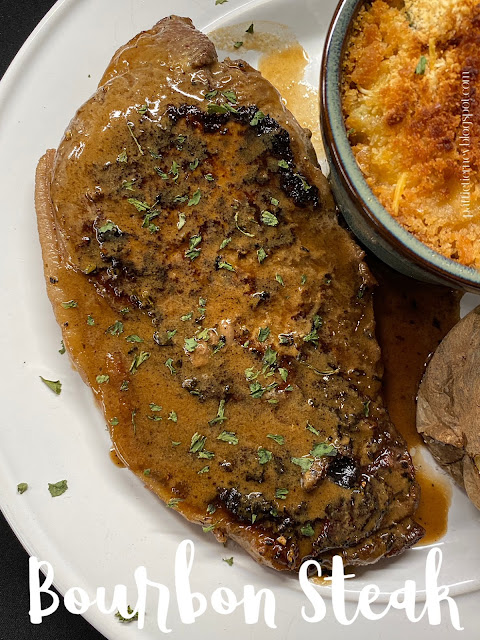
New Year’s Eve is not (has never) been my thing, but that doesn’t mean that I didn’t usher in the year in fine fashion with an easy, but elegant, tasty dinner for one. I only prepared one steak, but kept all of the sauce ingredients the same. The sauce makes a delicious gravy for slices of meatloaf, or topping for beef patties. I paired my steak with a baked potato and individual serving of a mixed vegetable casserole (recipe coming).

Bourbon Steak
Slightly adapted from diethood.com
FOR THE STEAKS:
4 4-oz. top sirloin steaks, 1” thick, room temperature
Kosher salt and freshly ground pepper, to taste
2 T. Dijon mustard, divided
2 T. butter, divided
FOR THE BOURBON SAUCE:
1/3 c. bourbon
¼ c. low sodium soy sauce
1 t. low sodium Worcestershire sauce
1 t. Fresh lemon juice
¼ c. packed light brown sugar
½ t. dried basil
½ t. dried rosemary
2/3 c. half and half
FOR THE STEAKS
Prepare steaks by seasoning with salt and pepper; set aside for 20 minutes.
Heat a large cast-iron skillet over medium-high heat. Rub steaks with Dijon mustard. Transfer steaks to heated skillet, two steaks at a time, and add 1 tablespoon butter. Sear steaks and cook to desired doneness, about 3 to 4 minutes per each side for medium. Remove steaks from skillet and set aside. Repeat with the remaining steaks.
Add the bourbon sauce mixture to the hot skillet and cook over medium heat for about 2 minutes, or until slightly reduced. Stir in half & half and cook until thickened. Remove from heat and place steaks back in skillet; turn to coat.
Serve garnished with dried parsley.
FOR THE BOURBON SAUCE
In a small mixing bowl combine bourbon, soy sauce, Worcestershire sauce, light brown sugar, basil, and rosemary; whisk to combine.
As an Amazon Associate I earn from qualifying purchases.
-
.png)
It's time for my year-end wrap-up featuring the 10 most popular posts of 2022. It's an interesting assortment I think. A third of the favorites were breads. Last year my number one post was Streusel-Topped Pumpkin Loaf that won by a landslide; this year Pumpkin Spice Zucchini Bread did the same. Last year only one of my tablescapes made it into the top 10, this year tablescapes and home made up 50%. This has been doing a lot of thinking as to what to post next year (and how I am going to top the last two pumpkin loaves!).
Thanks to all of you who visit my blog, I really appreciate having you here. To see the blog post and recipe associated with each of these pictures (shown in descending order of popularity), click on the title below the photo and it will take you directly to the post.
Happy viewing, and have a wonderful New Year!


Zippy Horseradish Cheese Spread

Butter Dip Cheddar Bay Biscuits


Gathering in the Garden Tablescape
To view previous Top Ten Lists click one or more of the follow links:
-

This post is for all of you who had a thing or two go wrong with your holiday meal. As I write this it is Christmas Day, and I still can’t wrap my head around the disaster that was yesterday’s meal. This meal had been planned weeks in advance. The house looked beautiful and glowed with the soft warmth of fairy lights twinkling in five trees of various sizes. Christmas music was playing in the background, a fire crackled in the fireplace; everything was picture perfect…or so it seemed.
Quite early the day went to hell in a hand-basket. I had brined my turkey breast (I won’t even go into the difficulty of that considering the pipe to my pot filler had frozen because our high temperature was 5°F) the day before. When I got up Christmas Eve morning (at the butt crack of dawn) I removed the turkey breast from the brine, rinsed it and patted it dry, rubbed it with herbs, lined my 6-quart slow cooker with celery, onion, and baby carrots, and slowly lowered the turkey breast in. I filled the cavity with aromatics and turned it on High setting, setting a kitchen timer for an hour, at which point I would lower the setting to Low, and let it simmer, filling the house with the scent of turkey goodness for the next six hours. At this point, quite pleased with myself, I pressed on with my frantic day.
When the timer went off an hour later, I set it to Low, and continued on. An hour hence, when my nostrils weren’t being tickled by luscious turkey aroma, I peeked through the glass lid of the slow cooker. Huh. Nothing looked different. I took the lid off and my turkey was still cold. My expensive slow cooker, purchased a mere 13 months prior, had given up the ghost.
I got in touch with number two son, Andrew (the child who once, on the morning of Thanksgiving, pummeled a turkey breast that had not thawed after three days in the refrigerator – apparently when I shoved the behemoth into the refrigerator, I moved the temperature up to the “North Pole” setting, and it remained frozen all the while I thought it was thawing nicely, but that’s another story), and we jointly decided that it was far too dodgy to cook that turkey via another method after it had been, essentially, sitting at room temperature for two hours. So out went the crockpot, turkey and all (with a mighty crash into the trashcan), out came the old back up crockpot that I’ve had for decades into which I shoved a roast beef..PNG)
While my old reliable (read: cheap) slow cooker chugged along, I decided to serve a house cocktail that I had prepped that morning and sampled perhaps a bit too much. When asked about it (it, at least, was a success), I replied that it was called Rudolph’s Gay Spritzer…errr, Rudolph’s Spritzy Titzer. I mean, Rudolph’s Tipsy Spritzer! Yeah.
As we opened gifts and chatted, hoping beyond hope that the beef would be juicy and tender, it wasn’t. Because of all of the goings-on earlier that day, there just wasn’t enough time to thoroughly cook the beef to succulent goodness and we ended up with beef-tasting shoe leather that my son and daughter-in-law (God love them) ate, commenting on its “good flavor” (and doesn’t that just say everything — similar to when you describe someone as having “a good personality”), as well as the accompanying sides that were all designed to be served with turkey — mashed potatoes, dressing, corn pudding, green beans, cranberry salad, and rolls. Because I’d kept giving the beef more time, the side dishes over cooked. The bread in the dressing had turned to sawdust; the corn pudding was mistaken for cornbread. The Rhodes rolls that I had taken out of the freezer and put onto the counter at 6:30 AM had still not risen by 3 PM, but out of pure orneriness, I baked them anyway. We needed an electric knife to cut them open. Fortunately, the pie was a success. I had bought it.
So, if you’re ever having difficulty preparing a meal, I want you to remember this post. It happens to the best of us. The meal may not have been enjoyable, but I guarantee you this is one Christmas Eve dinner we will never forget!
-

Christmas morning is not the time that you want to be laboring over the stove, and yet you want to serve your family and/or friends a lovely, special breakfast suitable to the occasion. Here’s the way to do most of the work the day before. This wonderful, flavorful Cheesy Ham Sauce is quite the crowd pleaser. The beauty of it is that it can be made one to two days ahead of time and simply reheated. Use it as a topping for toasted English muffins, toast points, or as I like to use it, on top of an omelet or scrambled eggs. You can even ladle some over a poached egg. It makes a lovely presentation, a hearty meal, and something very special without a lot of work in the morning that you plan to serve it.

Cheesy Ham Sauce over Eggs
½ c. butter
¼ c. flour
1½ c. whole milk
½ c. water
1 t. chicken soup base
¾ c. shredded cheddar cheese
1 t. prepared mustard
1 t. Worcestershire sauce
2 c. cooked ham, cubed
½ c. sliced mushrooms
¼ c. ripe olives, halved
¼ c. chopped Melissa’s roasted red peppers
¼ c. scallions, diced
In a medium sauce pan melt butter. Blend in flour. Cook and stir for 2 to 3 minutes until the flour becomes amber in color. Slowly pour in milk, water, and soup base. Cook and stir until thickened. Add cheese, mustard, and Worcestershire sauce, stirring until cheese melts. Add ham, mushrooms, olives, red peppers, and scallions. Stir to combine and heat through. At this point it can be poured over the top of omelets, a baked egg casserole, or scrambled eggs.
This can be made ahead and stored in a covered dish in the refrigerator for up to two days..PNG)
As an Amazon Associate I earn from qualifying purchases.
-
(1).png)
Yesterday was the winter solstice, and what does that mean for gardeners? It means it was the day to plant garlic. The garlic mantra is: plant on the shortest, harvest on the longest. That means, should everything go as planned, that I will be harvesting garlic on June 21.
You have to love gardening to go out in the bitter cold with an ice pick to make holes in the soil in order to plant. That’s devoted. I waited until the warmest part of the day (34° F), and I planted about 20 cloves in a 24-inch diameter pot approximately 2 inches deep. The root end is planted down with the pointed end sticking up. Garlic likes loose soil, so I made sure the soil I was hacking into had a nice mixture of perlite. We’re expecting rain and wintry weather tomorrow, so it should get a decent watering..jpg)
There are a lot of reasons for growing garlic, not just because it is so delicious, but also because there are so many health benefits:
1. It boost the immune system
2. Regulates blood sugar
3. Fresh garlic can kill E. coli and salmonella
4. Contains mood boosting vitamin B6If you’ve never had fresh garlic, let me tell you that it is heavenly! When you cut into it, juices run. That should give you an idea of how old that garlic you're buying at the supermarket is.
As prices at the grocery stores continue to climb, it’s more important now than ever to learn how to grow your own food. You don’t need a lot of space, just a couple of plant pots, some sacks of soil, and you can get started.
Who plants a seed beneath the sod, and waits to see, believes in God..jpg)
-
.PNG)
Prior to this week I had never had fajitas. Never! Honestly, I didn’t get what the big deal was. Now I know, and since that time I’ve made them twice. They are so easy to put together, super delicious, hearty and filling, wonderfully tasty, not to mention versatile, so much so that they are going to become a regular part of my meal rotation.
The first time I tried them I used a commercial seasoning packet. It was way too hot for me. In looking at the list of ingredients on the package I saw that chili pepper was the first ingredient. That said everything to me. After a bit of experimentation with a variety of recipes, I came up with what I think is the absolute best..PNG)
Fajitas
Seasoning:
1 T. cornstarch
2 t. chili powder
1 t. sea salt
1 t. smoked paprika
1 t. ground cumin
1 t. granulated sugar
1/2 t. onion powder
1/2 t. garlic powder
1/8 t. Mexican oregano
1/8 t. cayenne pepper
Mix together all ingredients and store in an airtight container at room temperature.
To make fajitas:
Fajitas are easy to put together. Choose a protein (I used a pound of boneless, skinless chicken breasts), one pepper (I used 1/2 red pepper and 1/2 yellow pepper) thinly sliced, and 1/2 red onion, thinly sliced. Put a tablespoon of olive oil into a 9 to 10 inch sauté pan and get it hot. Add chicken and cook for 3 to 4 minutes. Allow it to sear on each side, so let it cook for a good two minutes before turning it over to sear the reverse. Use a slotted spoon to remove the chicken to a heated plate. Add thinly sliced peppers and onions add more olive oil, if necessary, to the pan. Sauté until vegetables are soft. Return chicken to the pan along with 1/2 cup of water (or Bloody Mary mix, as I did), and two heaping tablespoons seasoning. Give it a good stir. Cover and cook until heated through and sauce is reduced to your liking. Serve on warm tortillas with salsa, cheese, sliced scallions, slices of avocado, and sour cream..PNG)
As an Amazon Associate I earn from qualifying purchases.
-

It has become a bit of a tradition here on the blog to share my annual Christmas card. I have been making my own for the past five years now. If you’d like to take a look at what I’ve done in the past, here are cards from 2018, 2019, 2020, and 2021. I always try to use a picture on the front that is personal. I like to share a little bit of personal information on the inside whether it’s about my home and lifestyle, or a recipe. The back always has a picture of something memorable from the current year, or those past.
 This year’s card features a picture from the blog of one of my favorite tablescapes. At the time I was taking the pictures I had it in the back of my mind that one of them would make an excellent Christmas card, and I believe I was right. This is not the first time that I have used a blog post photo on a greeting card. You can find my Chinese New Year card from 2019 herewhere I did it for the first time and really liked the results.
A popular side dish that I serve at Thanksgiving and Christmas is mySugarplum Fairy Salad, so I decided to share the recipe in this year's card. As a consequence, I thought “Eat drink and be merry” would be the perfect inside sentiment.
Stanley takes part this year in advising us to rest and not get stressed out over the holidays.
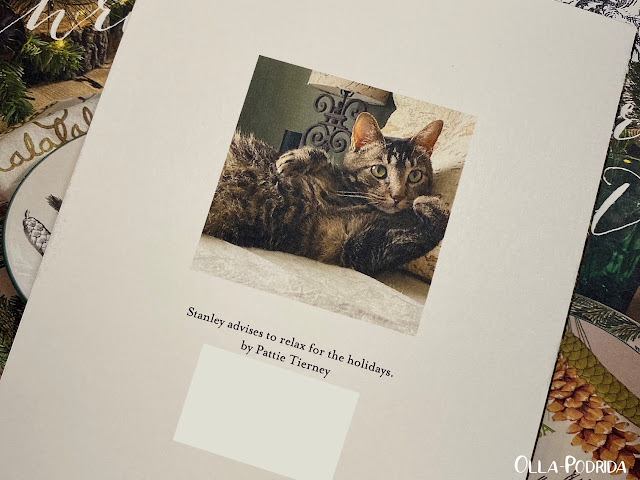
Merry Christmas to all!
-

Some time ago I found a recipe for stuffed pickles online and kept it in the back of my mind. Part of me thought they would be really good, the other part of me thought they might be downright appalling. This week, armed with a huge jar of pickles (That, in my attempt to open, I flung across the room, watched it carom off one of the cabinets, hit the floor, and roll right back, landing at my feet, unbroken. Whew!) I decided to give it a try. They were really good! I like pickles, but I’m not an over-the-top lover of pickles, and I really enjoyed these. If you have friends who are pickle fanatics, they will be forever in your debt. The filling can be made ahead, as well as the slicing and hollowing out of the pickles. Store them covered, in the refrigerator, cut side down on a paper towel until ready to stuff.

Stuffed Pickles
4 large whole dill pickles
4 oz. cream cheese, softened
½ c. grated sharp cheddar cheese
½ t. dry ranch dressing mix
2 thick slices bacon, cooked and crumbled
Freshly ground black pepper
Slice pickles in half lengthwise and, using a grapefruit spoon or something similar, hollow out the insides.
Place cream cheese, cheddar cheese, ranch dressing mix, bacon, and lots of pepper into a medium mixing bowl. With a hand mixer, beat until creamy. Generously stuff each hollowed out pickle and place into the basket of an air fryer. Air fry for eight minutes at 400°F. Serve warm with ranch dressing on the side, or drizzle a bit over the tops.
As an Amazon Associate I earn from qualifying purchases.


.PNG)

.PNG)
.PNG)
.PNG)
.PNG)
.PNG)
.PNG)


.PNG)


.png)


.PNG)


.PNG)
(1).png)
.jpg)
.jpg)
.PNG)
.PNG)
.PNG)


Portobello Cream Sauce
in RSS Feeds
Posted
1 T. butter
1 T. extra virgin olive oil
6 oz. portobello mushrooms, thinly sliced
½ t. Montreal Steak Seasoning
1 t. Dijon mustard
1 c. heavy cream
Salt and freshly ground black pepper, to taste
Parsley flakes, or freshly chopped chives, to garnish
Melt butter in a 10” skillet over medium heat. Add olive oil and raise the heat to high, getting the pan quite hot. Add mushrooms all at once, and let them cook for a minute without stirring. You want to get a nice sear on them. After a minute (or two) reduce heat, add steak seasoning, and sauté mushrooms until slightly softened, about 5 minutes. Stir in Dijon and heavy cream, and cook until sauce has thickened.
Remove from heat and stir in salt and pepper. Serve immediately over steaks, chops, or chicken, or toss as I did, with pasta.
As an Amazon Associate I earn from qualifying purchases.
View the full article